With so many vector features, you may not have thought of something like cropping an image in Illustrator. But you should. Select images in your layout and crop according to your need, without having to resort to Photoshop or another image editor.
Trim or set limits for your images. Everything is solved with the aid of corner widgets – handles of the edges of the image, used to adjust the image clipping – or mask, through vector shapes.
How to crop an image in Illustrator
- Open Illustrator;
- “Open” menu – find the image you want to crop;
- Or follow the shortcut “- + O” (macOS) or “Control + O” (Windows);
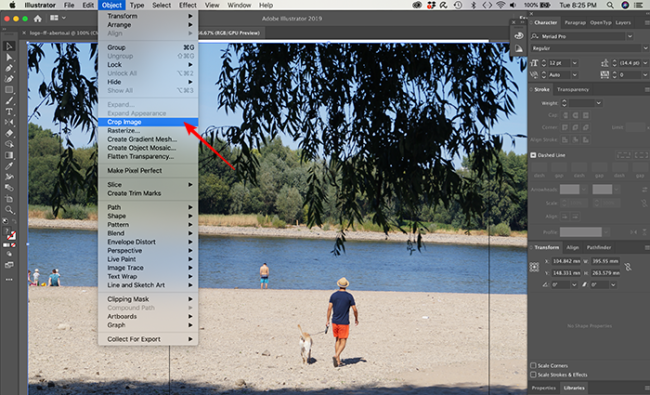
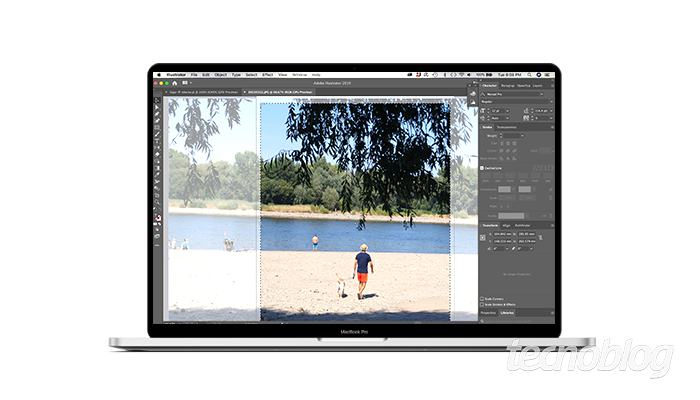
- “Object” menu > “Crop Image” – part of the image will be highlighted;
- Use the “Widget” (Handle) of cutting to set the cut boundaries;
- Adjust until you leave your image in the desired final format.

How to crop an image in Illustrator [crop widget]
Follow one of the procedures to resize the cut widget:
- Specify the height and width in the Control Panel;
- Drag the corner or edge handles;
- Press “Shift” to proportionally scale the widget;
- Press “Alt” to resize the widget in the center;
- Use the pinch gesture to adjust the zoom on touch devices.
![How to crop an image in Illustrator [crop widget]](https://betechwise.com/wp-content/uploads/2021/02/como-cortar-uma-imagem-no-illustrator-2-e1594147111510.png)
Follow one of the procedures to reposition the “widget”:
- Click and drag anywhere within the boundaries of the crop widget;
- Press the arrow keys to move the crop widget;
- Press “Shift” + arrow keys to move the widget by ten units (default) or as specified in your Preferences.
If you are working with a linked image, Illustrator prompts you to have the linked files embedded after the crop. Just click “OK” to continue.
How to crop an image in Illustrator [clipping masks]
Just like in Photoshop, Illustrator also has masks. Create different shapes and reveal only part of the image.
- Create the object you want to use as a mask;
- Use “Clipping Path” – name given to vectors created to be masks;
- Move the “Clipping Path” to above the image you want to mask;
- Select the vector and image;
- Menu “Object” > “Clipping Mask” > “Make”;
Or select the vector + image, right-click and choose the “Make Clipping Mask” option; Or follow the shortcut “- + 7” (macOS) – maybe on your computer it is another, but you can always consult the shortcut accessing the long path.
Remembering that any artwork can be masked, however, only vectors can be used as masks. You may also like how to remove shadows from a photo in photoshop.
Source: Adobe.

