
To launch a good idea, you need to expose it in the best way. The look is usually the one that helps the most in this process, in addition to knowing how to sell it, of course. Not sure how to make a mockup to share your ideas and impress a newsstand? So let’s take care of it.
It is possible to create a custom mockup, with photos taken by you or a professional hired, using a screenshot, or 3D of an object. For those who are in a hurry or do not wish to venture into the world of photography, it is possible to make use of free image banks.
How to make a mockup on Adobe Photoshop
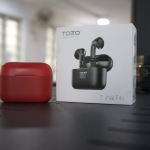
- Take a photo of the object or product you want to present (it can be a cell phone, in the case of an application, a computer, a website, billboard, book, etc.); Or download a photo from an image bank (if you are a beginner, produce or opt for frontal photos, in order to have less headache in obtaining a realistic result);
- Open Adobe Photoshop ;
- Menu “File” > “Open”;
- Or follow the shortcut “⌘ + O” ( macOS ) or “Control + O” ( Windows ).
With the image open, follow a few steps to insert your project image in the desired area.
- Create a layer above the image layer;
- With the pen or selection tool, draw a shape, covering the area where you want to apply an image;
- Enter any colour in this area;
- Select the layer that you coloured, click on it with the right button and choose the option “Convert to Smart Object”;
- If necessary, adjust the perspective in Menu “Edit” > “Transform” > “Distort”; Lower the opacity for a more realistic result. The manipulated layer will be in transparency so you can follow the curves and movement of the base on which you are creating the mockup;
- Press “Enter” to confirm the adjustments and return the image to 100% opacity;
- To add the image to the defined area, double-click on the Smart Object – a new tab will open;
- Menu “File” > “Open” and insert the image in the new tab, save it and return to the tab where the main image is located;
- Save your project in a safe place.
In the example of the tutorial, I used a white sheet, to later transform it into a photographed postcard, but you can use a beautiful environment, such as your desk, your smartphone with a nice, blurred background, a wall, a billboard, an ecobag, a mug… It takes more work, yes, but nothing like creating your own mockup library. Not everything is ready on the internet, some mockup options have already been used a lot. Value your work. Show your difference in the details.