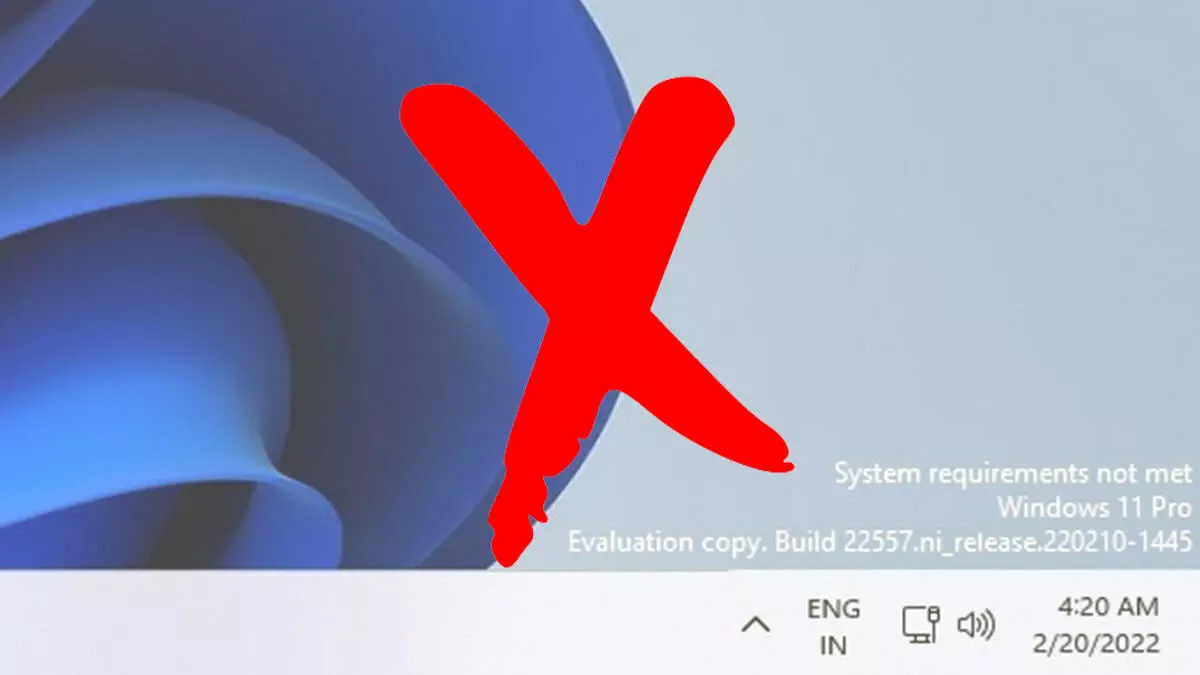
If you recently upgraded your PC, you may want to remove the unsupported Windows 11 watermark in case your computer doesn’t meet Microsoft’s requirements to run its new version of the operating system. Although the objective of this mark is for you to be aware that the computer can go wrong by running the version, the truth is that it can be really annoying.
Since the beginning of Windows 11, Microsoft has taken several turns when it comes to device compatibility. At one point it said which computers were allowed to update, then it said which ones were limited to doing so, then it removed the minimums, then it made changes to them… Which ultimately caused the awkward compatibility watermark to be created on the edge of the screen.
Compatible with Windows 11, or not?
In early February 2022, it was leaked that the next Windows 11 update would bring a notification for users running the operating system on an unsupported PC.
This incompatibility notification was finally incorporated in Windows 11 build 22557. The watermark on the desktop screen of the operating system reads: “System specifications not supported by Windows 11.”
In case you are using the operating system on a computer that was listed as unsupported, then you are in luck because it is now on the supported list. The truth is that if you use Windows 11 on a computer that does not have the conditions, you are probably aware of it, so a watermark reminder will not make a difference.
We will now explain a method that you can try and that was discovered by the Deskmodder site so that you can remove the annoying watermark. But it is important that you know that this procedure is done at your own risk since incorrect registry modifications can damage the installation.

- First of all, run “Regedit” with the keyboard shortcut Windows + R and type it in the dialog box, you can also type “Regedit” in the search box on the taskbar.
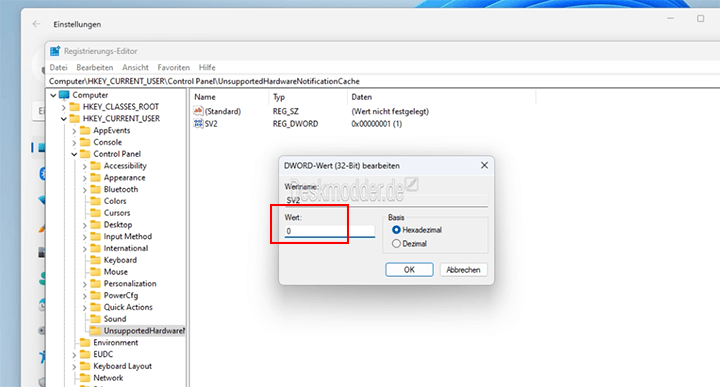
- Now, find the “UnsupportedHardwareNotificationCache”: HKEY_CURRENT_USER\NControl Panel\N-UnsupportedHardwareNotificationCache.
- Next, it modifies the value of SV2 DWORD inside it from 1 to 0.
- Finally, save and update.
In this way, the watermark will have disappeared, but knowing that your computer does not really have the minimum requirements to run this operating system correctly.


Nice