The Android “Settings” application includes a screen called “Developer options” (or Developer Options) that allows you to configure system behaviors that help you create profiles and debug your application’s performance.
In developer mode, you will be able to enable USB debugging , capture a bug report, activate visual feedback for touches, update window surfaces, use the GPU to render 2D graphics, etc. The list of options varies between Android versions.
It is necessary to activate developer mode to recover files, for example.
What you need to keep in mind is that:
- In Android 4.1 or lower, the Developer options screen is available by default.
- In Android 4.2 or higher, you must activate this screen to do what you need.
How to enable developer mode on Android
- Open the “Settings” application;
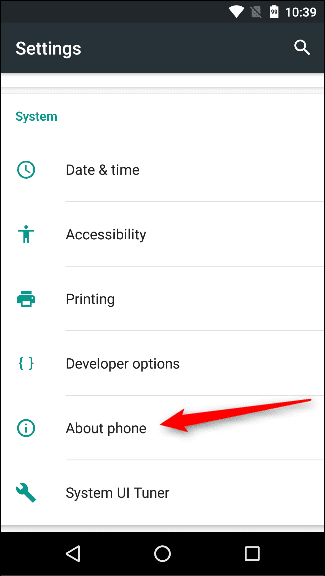
- In Android 8.0 or higher, select “System”;
- Scroll down and select “About phone”;

- Scroll the screen and tap “Build number” (Android version) 7 times.
- Return to the previous “Settings” screen and scroll to the end;
- You should now find the “Developer options”.
On some phones, it may be under the name “Development” , it’s the same thing.
Keep developer options enabled
At the top of the developer screen, you can activate and deactivate with a key all options at once. It is recommended, however, to keep all options available.
If you leave the switch off, most options are dead, except for those that do not require communication between the device and a computer to function.
Then, you must scroll down and activate USB debugging. This allows Android Studio and other SDK tools to recognize your device when it is connected via USB to the PC and you can use debugger and other tools.
